

The PC Extract / Data Clean-up Module is used by the State Administrators to prepare biennial reports on WIC participant and program characteristics. These reports, or PC Extracts, provide the most comprehensive and up-to-date statistics on WIC. The information is used to estimate budgets, design research, and review current and proposed WIC policies and procedures.
The biennial reports include the following information:
✓ Information on the income and nutritional risk characteristics of WIC participants.
✓ Estimates of breastfeeding initiation rates and duration.
✓ Data on demographic characteristics of WIC participants.
✓ Other information on WIC participation that is deemed appropriate by the Secretary of Agriculture.
ADHS delivers a PC Extract file every two years to the USDA for Arizona and each of its partners: American Samoa, the Commonwealth of Northern Mariana Islands (CNMI), Guam, and the Navajo Nation. The PC Extract file must first comply with the rules documented in the “Guidance for State Agencies Providing Participant Data,” also known as the Guidance, before it may be submitted to the USDA.
From the home page in HANDS click on Ops Mgmt on the main menu bar. Click on the navigation drop-down-list to view the different pages within Ops Management.
1. From the drop-down navigation list select PC Extract / Data Clean-up. The PC Extract / Data Clean-up page displays.
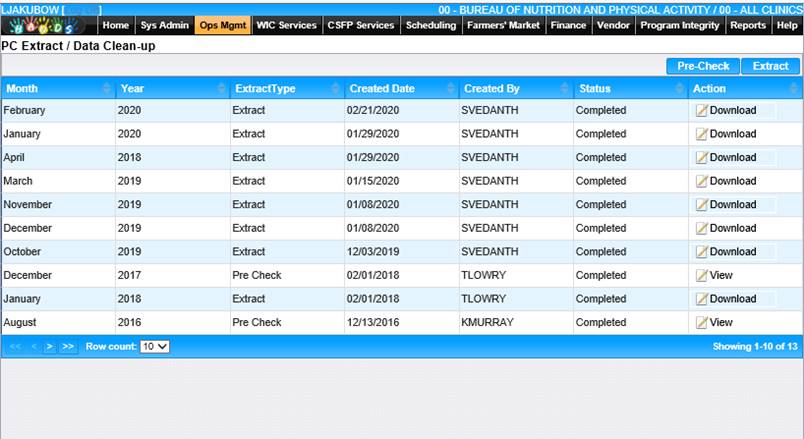
2. To validate participant data against criteria specified by the PC Extract Guidelines click the Pre-Check button. If the data complies with the guidelines, then participant data is ready to be extracted and submitted to USDA.
3. To generate a plain text file specially formatted which includes the final, corrected participant data that is submitted to the USDA click the Extract button.
To Pre-Check Data
The process to validate participant data against criteria specified by the PC Extract Guidelines. If the data complies with the guidelines, then participant data is ready to be extracted and submitted to USDA. The Pre-Check process validates the data of active participants where their current certification period falls within the year and month of the selected Pre-Check.
1. On the PC Extract/Data Clean-up screen select Pre-Check button. Pre-Check window displays.
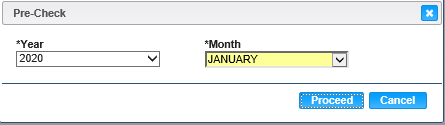
2. To select the year of the extract, select year from the Year drop-down menu.
3. To select the month of the extract, select month from the Month drop-down menu.
4. To continue with the pre-check process, click the Proceed button at the bottom of the Pre-Check window.
5. To discard pre-check process, click the Cancel button at the bottom of the
Pre-check window.
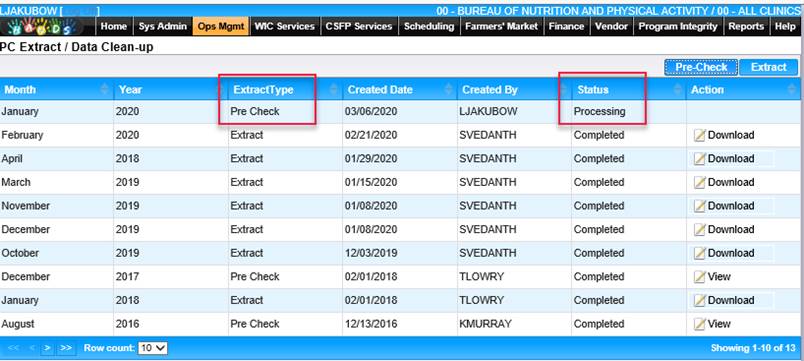
Note: When the Pre-Check is executed HANDS will display the words “Pre Check” in the Extract Type column and “Processing” in the Status column of the PC Extract / Data Clean-up grid. To refresh the grid the user must navigate out of the PC Extract / Data Clean-up screen. When the Pre-Check has completed HANDS will display a Status of “Completed” and the Action will display “View Icon” when the user accesses the PC Extract / Data Clean-up again.

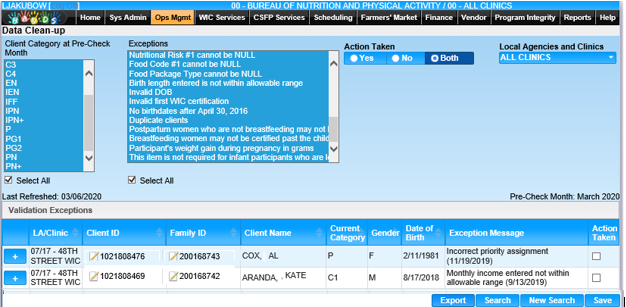
6. To review the Pre Check data, Click the View icon. The Data Clean-up screen displays. Local Agency and Clinic, may view the Pre-Check for their Local Agency/Clinic from WIC Services module, navigation list Data Clean-up.
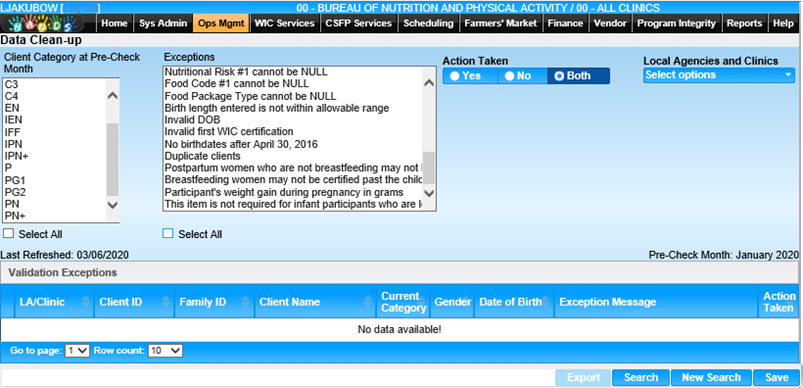
7. To define the Client Category at Pre-Check Month, select an individual client category, or if selected them all, select the “Select All” check box.
8. To define the Exceptions, select an individual exception or if selecting all, select the “Select All” checkbox.
9. Select the appropriate action button in the Action Taken section.
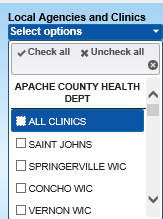
10. To select the Local Agencies and Clinics, click the Local Agencies and Clinics drop-down menu.
11. To perform a search according to the entered search criteria, click the Search button at the bottom of the page. Validation Exceptions display. Exception messages inform the user of the failed data validations that must be corrected. For certain exceptions, a date may also be provided and displayed in parenthesis. This date represents the date on which the exception occurred. If a client has multiple exceptions, then it will be displayed within a single record separated by commas.
12.
Click the ![]() (plus icon) to
expand the Validation Exceptions Details and the
(plus icon) to
expand the Validation Exceptions Details and the ![]() (minus
icon) to close the Validation Exceptions Details.
(minus
icon) to close the Validation Exceptions Details.
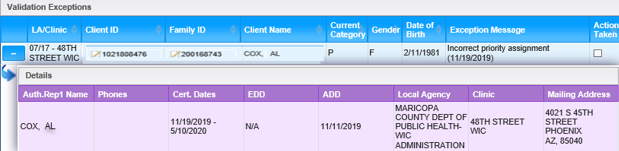
Once a Pre-Check has completed successfully, user may go to the Data Clean-up screen to review the exceptions for your Local Agency/Clinic. From the Data Clean-up screen, there is a direct link to the client so that you can make the data corrections immediately if the fields are editable or submit a request WIC Service Desk to correct the data if the fields are not editable.
Correct an Exception Record
Correcting data will require navigating between the clients’ screens and the Data Clean-up screen. Future enhancements to Data Clean-up will simplify and better integrate these two modules with direct mutual navigation between the screens. For now, each time you navigate away from the Data Clean-up screen and then return, you must re-initiate your search to review exceptions for your Local Agency/Clinic.
1. To correct an exception record, Select the family or client ID, user is directed to the family/client information.
2. Edit applicable information.
3. To save family/client record, click the Save button on the information screen.
4. Once record is corrected return to Data Clean-up page, perform search to retrieve record, place checkmark in Action Taken box, Click the Save button at the bottom of the Data Clean-up page.
5. To perform a new search, click the New Search button at the bottom of the Data Clean-up page. The entered search criteria will be cleared, and user can enter new search criteria.
6. To export the exceptions to a .CSV file which allows user to download/save the data file, click the Export button at the bottom of the page. The Export button becomes available once the search is executed.
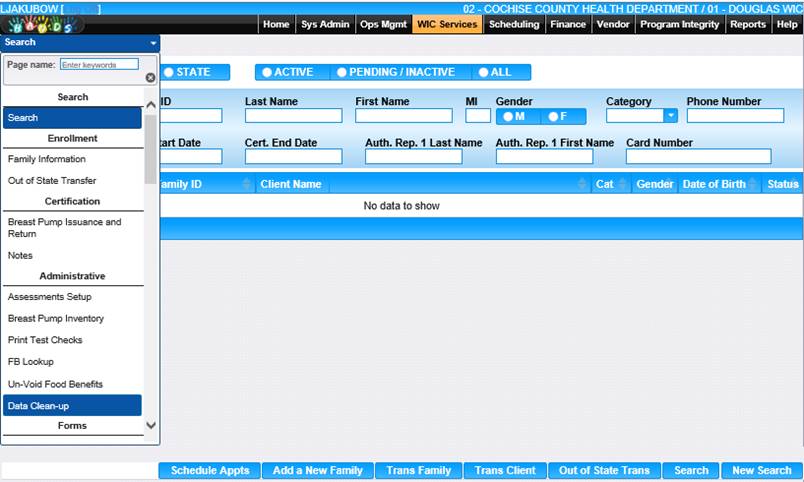
User may view the Pre-Check for their Local Agency/Clinic by going to the (1) WIC Services module, then clicking (2) Data Clean-up under Search menu illustrated in the below figure.
To Extract Data
1. On the PC Extract /Data Clean-up screen select Extract button. Extract window displays.
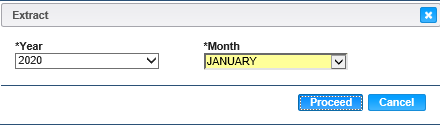
2. To select the year of the extract, select year from the Year drop-down menu.
3. To select the month of the extract, select month from the Month drop-down menu.
4. To continue with the extract process, click the Proceed button at the bottom of the Pre-Check window.
5. To discard extract process, click the Cancel button at the bottom of the Pre-check window.
Note: When the Extract is executed HANDS will display the words “Extract” in the Extract Type column and “Processing” in the Status column of the PC Extract / Data Clean-up grid. To refresh the grid the user must navigate out of the PC Extract / Data Clean-up screen.

When the Extract is complete HANDS will display the word “Completed” in the Status column and the Download icon will display in the Action column.

6. To open the Download file, click the Download icon. The user will be prompted to Open, Save or Cancel the action. The system names the Pre-Check Export as: PC_Extract_Exceptions_M_YYYY.csv, where ‘M’ equals the numeric value for month (i.e., January = 1) and YYYY equals the four-digit year: PC_Extract_Exceptions_1_2020.csv. CSV files may be opened using Microsoft Excel. If you don’t have Excel on your system, you may use Notepad. To view the extract in Notepad, click the Open button.
Note: There is a known issue of exports failing when the results set has tens of thousands of records. If it fails to export in the first attempt, it may succeed in subsequent attempts. It is recommended that you first filter exceptions before exporting.
![]()
7. To save the download, click the Save button.
8. To discard opening the download, click the Cancel button.