

There are two different methods to creating a notification which displays on the HANDS Home Page. When a Disaster Event has been added and associated with a Local Agency/Clinic, a system-generated notification is created. Notifications may also be explicitly created using the Notifications Base Table under Ops Mgt, where the User may add one or more notification(s) to a selected Local Agency/Clinic.
From the home page in HANDS click on Ops Mgmt on the main menu bar. Click on the navigation drop-down list to view the different pages within Ops Management.
Notification Search
1. From the drop-down navigation list select Notification. The Notification search page displays.
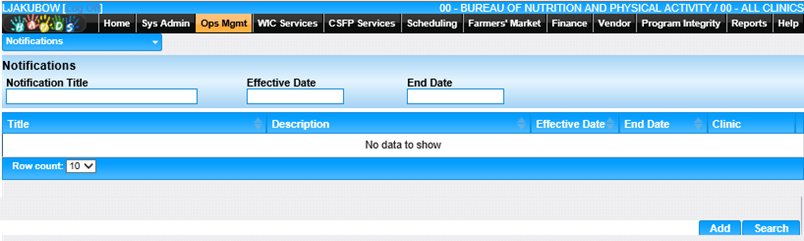
2. Enter the search criteria, Notification, Effective Date, End Date, click the Search button at the bottom of the page. The page will display search results.
View/Edit a Notification
1. Click on the Edit Icon on the Title in the search results. The Notification displays.
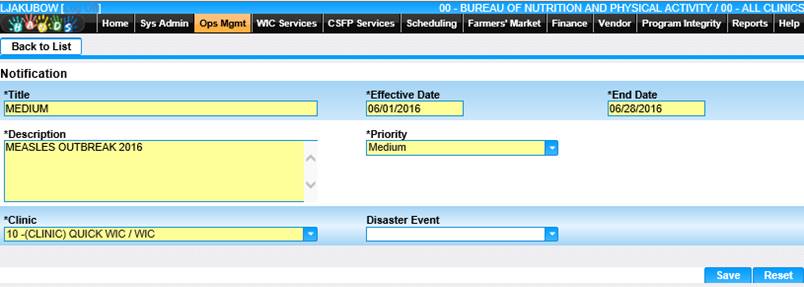
2. Add/Edit the information on the page.
3. To discard unsaved changes, click the Reset button at the bottom of the page.
4. To save changes, click the Save button at the bottom of the page.
5. To return to the main Notification page, click Back to List.
Add a Notification
1. On the Notification page, click the Add button at the bottom of the page. The blank Notification page displays.
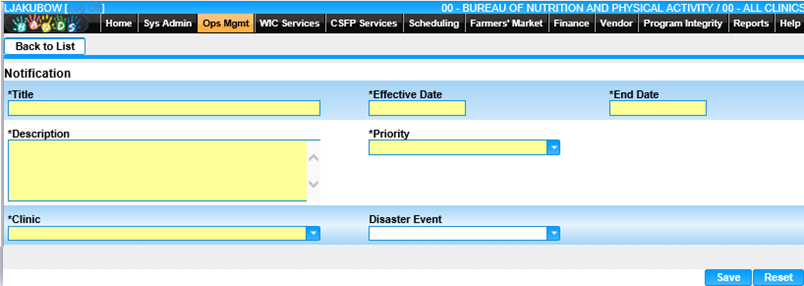
2. Enter all required fields and any other fields to complete the add page.
3. To identify the priority, select the Priority from the Priority drop-down menu.
4. To identify the Disaster Event, select the Disaster Event from the Disaster Event drop-down menu.
5. To discard unsaved changes, click the Reset button at the bottom of the page.
6. To save changes, click the Save button at the bottom of the page.
7. To return to the main Notification page, click Back to List.