

1. From the System Admin home page click on the Food Items link in the Food Benefits section. The Food Item search page is displayed.
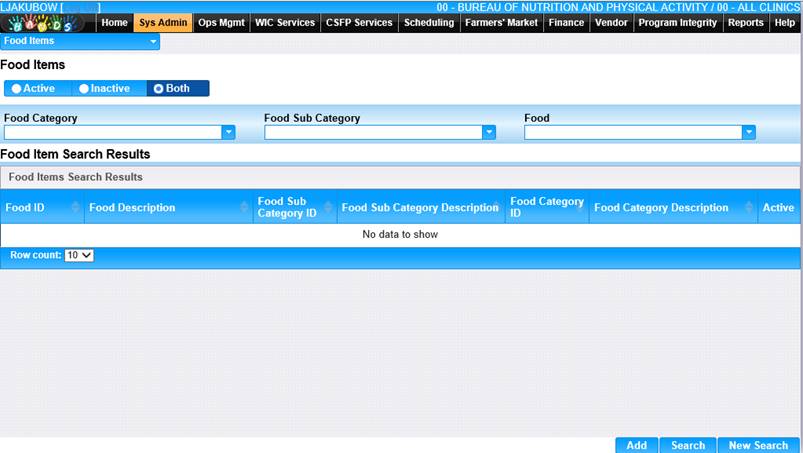
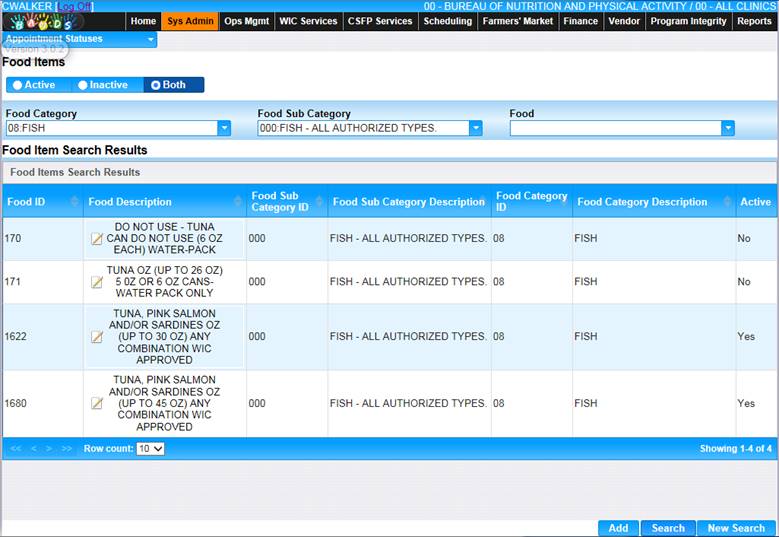
2. Enter the search criteria and click the Search button at the bottom of the page. The search results will display in the bottom portion of the page.
Add Food Item
1. From the Search page, click on the Add button at the bottom of the page. The blank Add Food Item page displays.
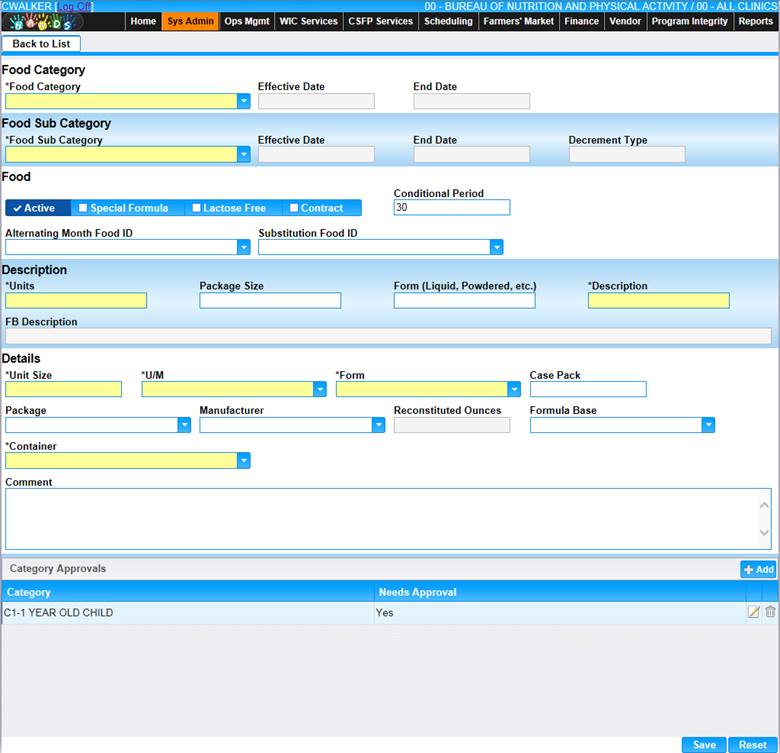
2. Enter all required fields and any additional fields to complete the Food Item page.
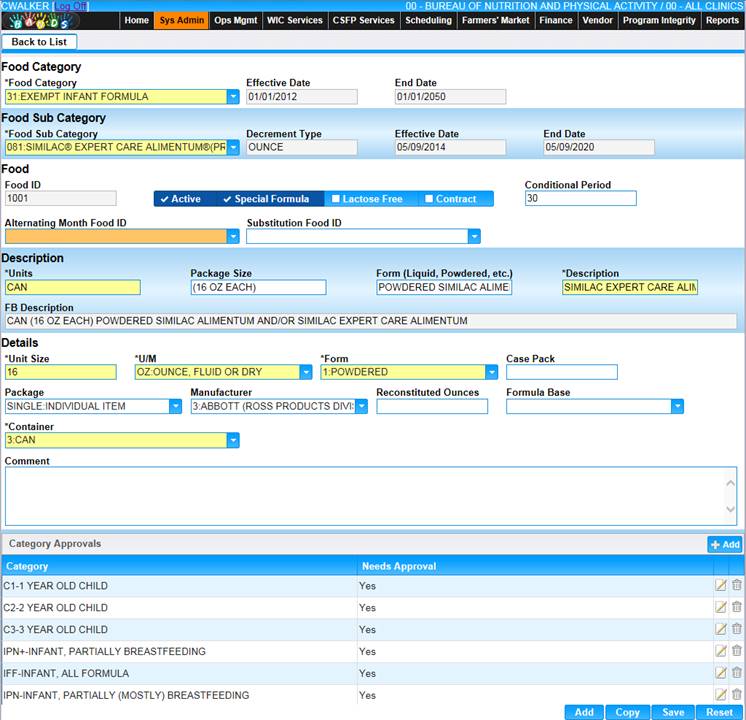
3. Once the Food Category is selected, the Effective Date and End Date are automatically populated.
4. Once the Food Sub Category is selected, the Effective Date, End Date, and Decrement Type are automatically populated with data from the Food Sub Category table.
Key Fields:
• The Alternating Month Food ID field determines if the food will be considered an alternate food. An alternate food is two foods that switch from month to month. For example: Rice and cereal are considered alternate foods in a particular food package that checks are being issued from. When the user goes to issue 3 months of checks month 1 will contain rice, month 2 cereal, and month 3 rice again. It is important to note that in order for alternating foods to work properly the user must go into both of the desired alternate foods and select one another in the Alternating Month Food ID field.
• The Substitution Food ID field determines which foods will be considered OR foods. An OR food will appear on the same FI and the user is allowed to receive either one or the other. For example: User can receive 3 Cans of Peanut Butter OR 4 cans of Beans. It is important to note that in order for Substitution foods to work properly the user must go into both of the desired substitution foods and select one another in the Substitution Food ID field.
• The Units, Package size, Form, and Description fields all link together to make the FB Description. The FB Description is what will appear when the food is printed on an FI.
• The Reconstituted Ounces field is only required for Formula foods.
5. Click the Add button in the Category Approvals section. The Add window displays.
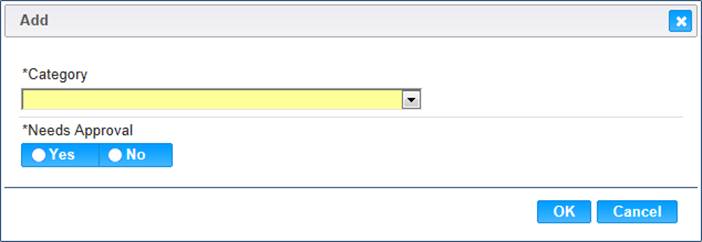
6. Select the Category and select whether the item needs approval.
7. To discard changes and close the window, click the Cancel button.
8. To keep changes, click the OK button.
9. To discard unsaved data, click the Reset button on the Food Item page.
10. To keep data, click the Save button on the Food Item page.
11. To return to main Food Category page, click Back to List.
Edit Food Item
1. From the search results, click on the Food Description link for the item you wish to view/edit. The edit Food Item page displays.
2. If applicable, update the appropriate fields, ensuring all required fields are filled in.
3. To discard unsaved changes, click the Reset button at the bottom of the page.
4. To keep changes, click the Save button at the bottom of the page.
5. To add a new food item, click the Add button at the bottom of the page.
6. To copy existing information to a new record, click the Copy button.
7. To return to main Food Category page, click Back to List.